Word Portrait
A picture is worth a thousand words. Reviving an old Computer Vision University project called Word Portrait (Artwork).
About
The idea of this project was given by Jeff Clark’s Word Portrait on his website neoformix.com, which shows an image of Albert Einstein only consisting of the text “Genius”. Fiete Botschen and I decided to take this image as inspiration for an University Computer Vision course project back in 2015. We successfully implemented an algorithm which generates similar “Word Portraits” like the one from Jeff Clark.
Till 2015 this project was put on hold. In January, 2018 I started to refactor and optimize the code by using a summed-area table, which boosted the run-time overwhelming well. Furthermore I implemented some sub-modules based on this algorithm, which allows for creating images consisting of Triangles, Circles and Rectangles.
The source code is open source and available on Github: https://github.com/ckreisl/artwork/
Albert Einstein as “Genius” Word Portrait
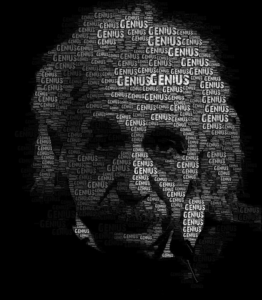
For the result above I used this Image of Albert Einstein with the free Font from www.1001freefonts.com.
How it works
Basically what this algorithm does is the following:
- Compute the Bounding Box (BBox) of the font you are using
- Take this computed BBox and move it over your image, starting in the top left corner of the image.
- (Check if there is a free spot for printing available on the image. Why we have to do this will be specified in step 7. Check the so called “used image” within the current BBox. All pixels within this BBox must be white. If the BBox contains a black pixel we now that there is already a text printed and we can move the BBox one pixel further)
- Compute the mean of this BBox based on the pixels
- Compute the variance of this BBox
- Use a threshold which defines whether we print or not. If the computed variance is smaller than the threshold we print otherwise we move the BBox further one pixel
- If we print the text gets printed with the Color(result mean) on the output image. In addition the text gets printed on a second image which is completely white. This image is called the “used image”. It will help us to check whether we already printed into this area or not. On this used image we the text is printed in black.
- Update the parameters by shrinking the font size which results in a new size of a BBox
- Repeat from Step 1. until your final condition is reached e.g. currentFontSize > minFontSize
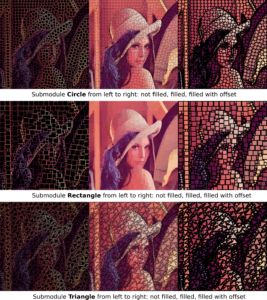
Sub-Modules
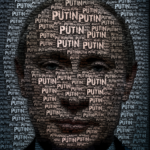
Besides words, other shapes can also be rendered. Compared to Words the runtime is much faster here. Examples of the different variants can be seen below.
More Examples
More information about the installation setup can be found on Github (check link below).
If you have any questions feel free to contact me.
Cheers,
Christoph Kreisl
CodevemberTeam 2020
All links collected:
Github : https://github.com/ckreisl/artwork/
Neoformix by Jeff Clark: http://www.neoformix.com/
Albert Einstein Original Image Source: http://www.abc.net.au/news/image/2912674-3×2-940×627.jpg
Vladimir Putin Image Source: https://medium.com/@arshdeep.nz/three-things-i-learnt-from-abstract-the-art-of-design-episode-7-f69d13215f16
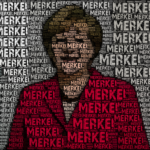
Angela Merkel Image Source: https://www.bundeskanzlerin.de/bkin-de/angela-merkel/im-portraet
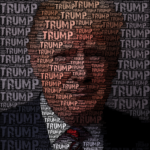
Donald Trump Image Source: https://lunasociety.org/trump-lunar-gold-rush